I'm back from Vietnam, and I thought I'd write a post about a way to make 30+ hours in transit a little more bearable. :) Of course you're not going to be able to do a full practice on an airplane, but just doing a couple yoga postures or parts of yoga postures (i.e. just the arms, not the legs) can really refresh you while you are stuck sitting for 13 hours. (my longest flight of the 3 flights in transit to Vietnam!)
Some airplanes have a larger galley or bulkhead area where you can break out a full posture or two if you're not shy, :) and that will be the subject of my next post. This post is about postures or parts of postures that you can do in the aisle i.e. while waiting in line for the bathroom.
Notes on airplane yoga:
Airplane yoga is not your usual yoga practice, so please don't try to get to the depth you would in a normal class or home practice! When you do these postures, your body will more than likely be cold and stiff from sitting, so take it easy on yourself and release into each posture with care and mindfulness.
In close quarters, be careful of the aim of your derrière. Make sure you're not giving someone a free show that they are not interested in seeing. :) Aim it toward a wall or down the aisle.
Same with your feet - make sure they stay on the ground or touching your body if you are in the aisle, otherwise they may be uncomfortably close to someone's seat.
Make sure to be respectful of the crew and other passengers as they move around the plane. Do not get in their way with your postures, and make sure to apologize if you end up in their way accidentally.
If you are not able to interlace fingers, hold a scarf/belt/purse strap behind your back instead.
If you would like a deeper release, try to lift your hands away from your low back, keeping the arms straight.
Standing neck releases
The neck releases from this post can be done standing up! Here are pictures, and for the descriptions click here.
Stay tuned for Airplane Yoga Part 2: Postures for the galley! (or slightly larger spaces than the aisle :) )
Some airplanes have a larger galley or bulkhead area where you can break out a full posture or two if you're not shy, :) and that will be the subject of my next post. This post is about postures or parts of postures that you can do in the aisle i.e. while waiting in line for the bathroom.
Notes on airplane yoga:
Airplane yoga is not your usual yoga practice, so please don't try to get to the depth you would in a normal class or home practice! When you do these postures, your body will more than likely be cold and stiff from sitting, so take it easy on yourself and release into each posture with care and mindfulness.
In close quarters, be careful of the aim of your derrière. Make sure you're not giving someone a free show that they are not interested in seeing. :) Aim it toward a wall or down the aisle.
Same with your feet - make sure they stay on the ground or touching your body if you are in the aisle, otherwise they may be uncomfortably close to someone's seat.
Make sure to be respectful of the crew and other passengers as they move around the plane. Do not get in their way with your postures, and make sure to apologize if you end up in their way accidentally.
Postures for the aisle
These are pretty unobtrusive and can be done in the aisle i.e. as you wait in line for the bathroom. Still, make sure you are not so absorbed in your postures that you get in the way of other passengers or flight attendants. :)
Dancer Modification (Natarajasana)
This is great stretch for the hip flexors and quadriceps, which get pretty stiff from sitting for several hours!
To get into the posture: Stand with your feet together, facing your body down the aisle rather than toward a row of seats. Bring your weight into your left foot, then bend your right knee and bring your heel toward your bum. Reach down and grab it with your right hand, and keeping your knees right in line with one another, bring the heel as close to your bum as you can, while engaging your core and pressing your tailbone down toward the floor.
 |
| Dancer variation quad stretch. |
In this variation, do not allow the low back to arch; it takes the stretch out of the hip flexors. Keep drawing your belly button up and in, and press your tailbone down in the direction of the floor.
 |
| Don't arch your low back, try to isolate the quads and hip flexors in this variation. |
Keep the knees together, do not let the lifted leg knee go behind you.
 |
| Knees not square, and notice I am tipping forward - not much of a release for the quads and hip flexors when done this way. |
If you want more leverage, grab the foot with both hands. Lean a shoulder against a wall or your hip against your seat (if yours is an aisle seat) for help with balance.
 |
| Grabbing the foot with both hands gives a bit more leverage to pull in the foot. |
Eagle Arms
Eagle arms is a nice stretch for the shoulders and opening for the upper back.
To get into the posture: Stand up tall with your feet either together or hip bone width. Cross your left arm under your right above the elbows, then take one of the three arm options: 1. Give yourself a hug with elbows crossed. 2. Bring the backs of your hands to touch. 3. Double-wrap the arms and bring your palms to touch. Lift your elbows toward shoulder height, and press your palms away from your face (if doing arm option 2 or 3). Stay for 5-10 breaths, then repeat with the left arm on top.
To get into the posture: Stand up tall with your feet either together or hip bone width. Cross your left arm under your right above the elbows, then take one of the three arm options: 1. Give yourself a hug with elbows crossed. 2. Bring the backs of your hands to touch. 3. Double-wrap the arms and bring your palms to touch. Lift your elbows toward shoulder height, and press your palms away from your face (if doing arm option 2 or 3). Stay for 5-10 breaths, then repeat with the left arm on top.
 |
| Arms option 2: arms single wrapped with the backs of the hands touching. |
 |
| Arms option 1: arms crossed above the elbows. |
 |
| Arms option 3: double-wrapped arms with palms touching. |
Cow Face Pose Arms (Gommukasana Arms)
Another nice opening for the shoulders.
To get into the posture: Standing in the aisle, bring your left elbow toward behind your head and your right elbow at your side with your right hand reaching up behind your back. If you can reach your hands and grasp them together from this position, stay and breathe for 5-10 breaths! If you are not able to reach the hands to one another OR if you feel pinching or pain in the shoulder joints, grip a scarf, belt or detachable purse/luggage strap. :)
 |
| Try a strap between the hands to make gommukasana arms easier on the shoulders. |
 |
| If gommukasana arms are not comfortable for your shoulders, just do one arm! Riddick's tail makes an appearance. :) |
 |
| Full gommukasana arms with hands clasped behind the upper back. |
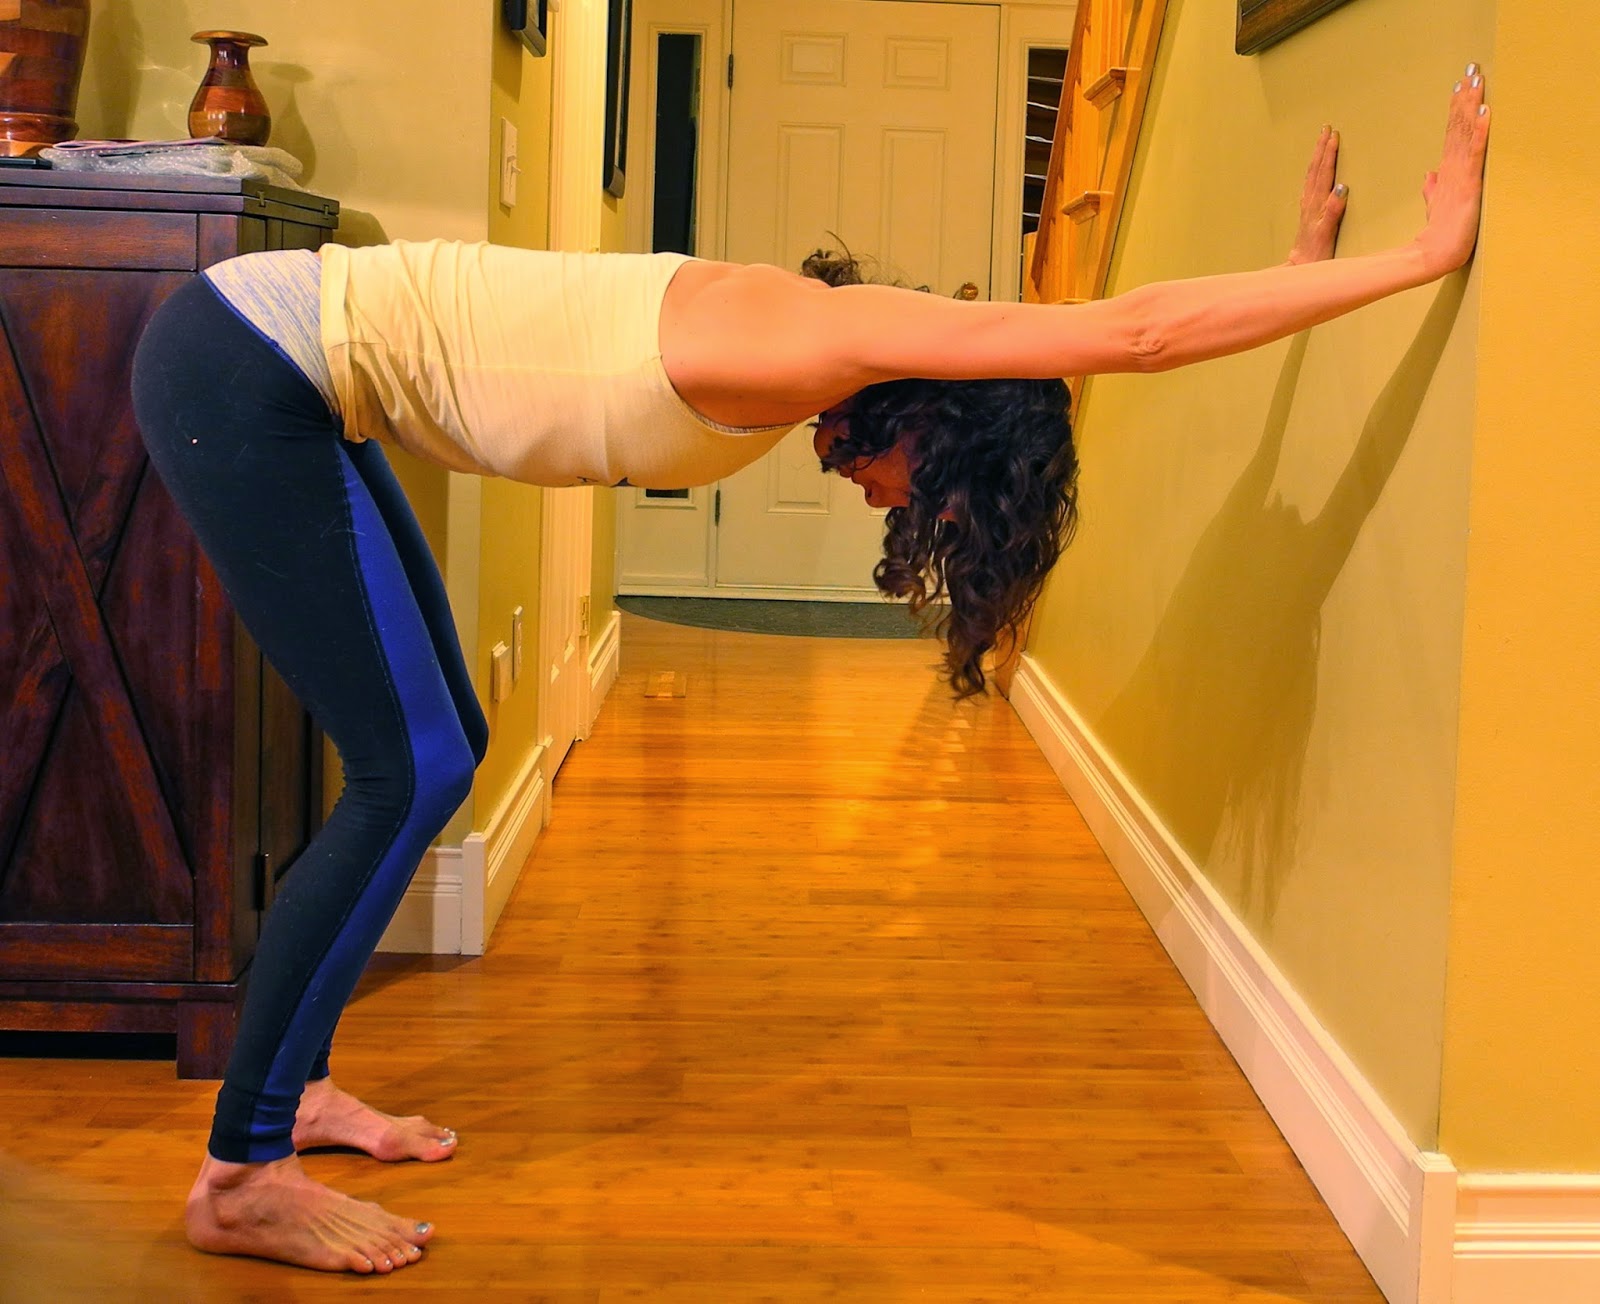
Standing chest expansion
This is a nice way to undo the forced slouchiness of an airplane seat.
To get into the posture: Stand facing down the aisle, and interlace your fingers behind your back. Press your palms together it possible, and without bending forward, lift your hands off your bum toward the ceiling, keeping the arms straight. Squeeze your shoulder blades toward each other behind your back and lift your chest up toward the ceiling. Stay for 5-10 deep breaths, then release and interlace your fingers with the other set on top and repeat.
 |
| Standing chest expansion with palms pressed together. |
 |
| Standing chest expansion with palms apart if shoulder tightness does not allow the palms to come together. |
If you are not able to interlace fingers, hold a scarf/belt/purse strap behind your back instead.
 |
| Chest expansion with a strap. Sub a purse strap, luggage strap, scarf or belt on the airplane. :) |
 |
| Chest expansion, a little deeper opening with hands away from the back. |
Standing neck releases
The neck releases from this post can be done standing up! Here are pictures, and for the descriptions click here.
 |
| Neck release 1. |
 |
| Neck release 2. |
 |
| Neck release 3. |
 |
| Add the weight of the other arm to your head to add on to any of the three neck releases. Make sure not to pull, just let gravity do the work. |
Stay tuned for Airplane Yoga Part 2: Postures for the galley! (or slightly larger spaces than the aisle :) )